
This guide is available as a video:


This guide is based on WHMCS being installed in public_html. WizardPanel will work with WHMCS installed in any directory but for the best setup using our WHMCS designs we recommend having WHMCS installed in public_html (root). - How to move WHMCS location
If you have any issues installing WizardPanel please submit a support ticket, we will be happy to provide assistance and can even install for you for free.
Installation Guide
Let's get started with the installation.
1. Unzip the folder
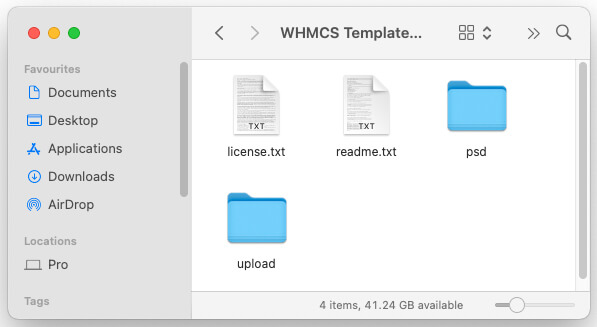
Once you have downloaded the files extract the ZIP (WizardPanel for WHMCS Version.zip) and move to your desktop.
2. Upload files
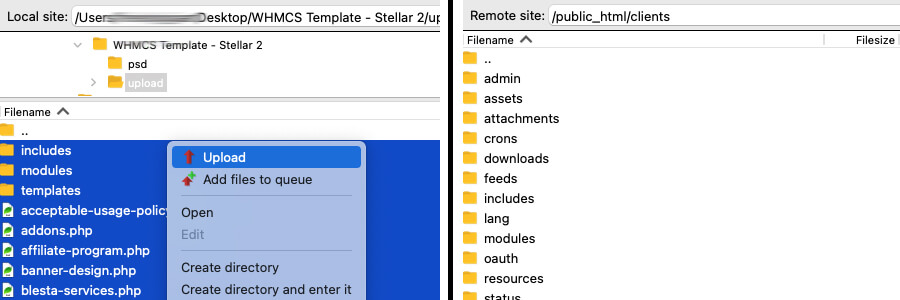
Open up FileZilla and login to your web hosting account as normal. On the left side (your local computer's files) navigate to the upload folder as seen above. On the right side (your web hosting account) navigate to inside the WHMCS folder as seen above. Select all of the files from the left side, then upload. Both the server and local side will contain WizardPanel and all designs. These files are unique so will not override any WHMCS files.
3. Activate WizardPanel
Login to your WHMCS admin and go to Configuration () > System Settings > Addon Modules. Click this link as seen below:

Having issues on this page?
The page is blank (white) - this means you need different WizardPanel files for your server (e.g you're running a different version of PHP)
The page shows no styling/CSS - this generally means you need to update the PHP memory limit on your hosting account as per WHMCS's recommendations
Next scroll down to the bottom of the page and activate WizardPanel:

Once activated scroll down to the very bottom of the same page click on the configure button set the user permission to Full Administrator and save.
You should now find WizardPanel under WHMCS Admin > Addons > WizardPanel. Visit WizardPanel, add your license key and save. WizardPanel should now show as active and you should see all of the available tabs.
4. Activate the design
If you don't want to go live right away it's easy to work on the design in the background
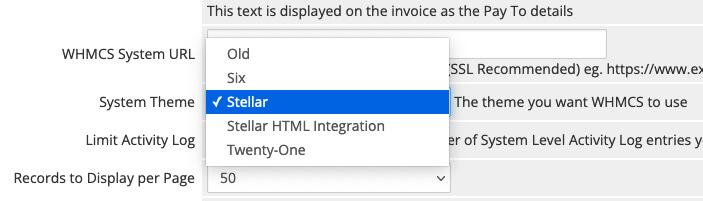
Lastly to activate your design login to your WHMCS admin area and go to Configuration (Spanner Icon in the top right) > System Settings > General Settings > Select your chosen design under System Theme and save.
WizardPanel is now installed successfully. You should see your design displaying correctly in the front-end with all pages working.
Cart Template
WizardPanel modifies the WHMCS cart pages without the need for a separate cart template. This is a benefit as it means you can choose between either of the default WHMCS carts and those carts will automatically be updated along with WHMCS. We recommend using the Standard cart template from WHMCS.
Work On Your Website In The Background
If you want to work on your WizardPanel design before making it live go to Addons > WizardPanel > Designs. By default it will be set to auto displaying your WHMCS set template. You can override with your chosen WizardPanel design. You will see a preview button which will open your selected design so you can view and customize it before making it live. To make it live set the override back to auto and follow step 4.
Request Support
We hope you found this documentation useful. If you run into any issues we will be happy to assist you.