
WizardPanel for WordPress utilises cutom fields to display the banner on sub-pages. The banner custom field supports our pre-made shortcodes for displaying a banner or sub-banner.
How To Enable Custom Fields
By default WordPress has the custom fields hidden from pages. To enable this feature follow the steps below:
1. Login to your WordPress admin panel
2. In the left menu click on Pages and then edit the page you would like to customize.
3. In the top right corner click on the 3 dots menu.
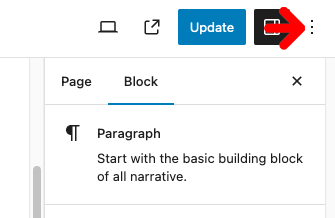
4. Next click on preferences.
5. Click on the panels link on the left side.
5. Enable Custom Fields under the Additional section.

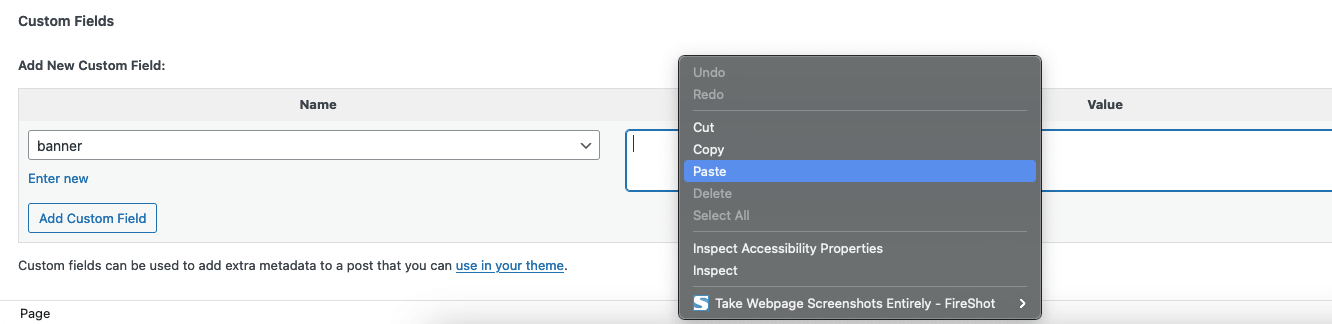
Close the panel and scroll down to the bottom of the page to see the Custom Fields. This section will now be enabled when editing either of your pages.

Customizing The Banner
Within the Custom Fields section of the page you will be able to enable Banner. This custom fields will add your content below the menu. Many of our pages include a banner which will be customizable here. If you have created a new page you can add a banner here using our pre-made shortcode. Simply copy the shortcode and paste within the Banner custom field.
Request Support
We hope you found this documentation useful. If you run into any issues we will be happy to assist you.